seo
How to Print on Waller Printing at Home
How to Print on Waller Printing at Home
Adding a personal touch to your walls or showcasing your favourite images is easier than ever with waller printing at home. This DIY project allows you to achieve professional results right from the comfort of your home. Here’s a comprehensive guide on how to print on waller printing at home to help you navigate the process and ensure a flawless finish.
Materials Needed
Before you dive into your waller printing at home project, gather the following materials:
-
Waller Paper:
This specialized paper is designed to adhere well to wall surfaces.
-
Printer:
A high-quality inkjet or laser printer is ideal for crisp, clear images.
-
Adhesive:
Use a wall-friendly adhesive or wallpaper paste that won’t damage your wall.
-
Scissors or Craft Knife:
For precise trimming of your printed image.
-
Ruler:
Ensures accurate measurements and cuts.
-
Squeegee or Smooth Roller:
Helps to smooth out the image and remove air bubbles.
-
Measuring Tape:
Essential for accurate placement and alignment of your print.
Choosing the Right Image
The image you select can make or break your waller printing at home project. Here’s how to choose the perfect one:
-
Resolution:
Opt for a high-resolution image (at least 300 dpi) to avoid pixelation. High-quality prints look sharp and professional.
-
Size:
Measure the wall space where you want to place the image and select a size that fits well. Larger images make bold statements, while smaller ones can add a subtle touch.
-
Theme:
Choose an image that complements your room’s decor. Whether it’s a landscape, abstract art, or a personal photograph, ensure it enhances the space’s overall aesthetic.
Preparing the Wall for Printing
Proper wall preparation is crucial for a smooth application:
-
Clean the Wall:
Wipe down the wall with a damp cloth to remove dust, grease, and other debris. A clean surface ensures better adhesion of the wallpaper.
-
Smooth Surface:
Check for cracks, holes, or imperfections on the wall. Fill these with spackle and sand the area until it’s smooth. A well-prepared surface helps prevent bumps and bubbles in your print.
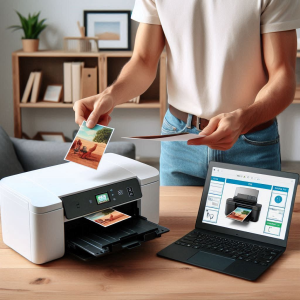
Printing the Image on Waller Paper
To achieve the best results, follow these steps for how to print on waller printing at home:
-
Load the Paper:
Insert the wallpaper into your printer according to the manufacturer’s instructions. Make sure it’s properly aligned to avoid misprints.
-
Print Settings:
Set your printer to the highest quality print settings. Select the correct paper type if your printer has that option. This ensures vibrant colours and sharp details.
-
Print a Test Page:
Before printing the final image, print a test page to check colour accuracy and alignment. This step helps avoid wasting materials and ensures the final print meets your expectations.
Trimming and Preparing the Image
Once your image is printed, it’s time to prepare it for application:
-
Trim Edges:
Carefully trim the edges of the printed image using scissors or a craft knife. Ensure the image fits your wall space precisely for a clean look.
-
Test Fit:
Hold the trimmed image up to the wall to check the fit. Make any necessary adjustments before applying the adhesive.
Applying Adhesive to the Wall
Proper adhesive application is key to a successful print:
-
Choose Adhesive:
Use a wall-friendly adhesive suitable for wallpaper. Avoid heavy-duty adhesives that might damage your wall.
-
Apply Evenly:
Apply a thin, even adhesive layer to the wall using a brush or roller. Ensure the entire area where the image will be placed is covered.
-
Allow to Set:
Follow the manufacturer’s instructions regarding drying time. Typically, you’ll need to let the adhesive sit for a few minutes before applying the image.
Placing the Image on the Wall
The placement of the image is crucial for a professional finish:
-
Position the Image:
Carefully align the image with the adhesive-covered wall. Start from one edge and gradually work your way across.
-
Smooth Out:
Use a squeegee or smooth roller to remove any air bubbles and ensure the image adheres smoothly. Work from the centre outwards to push out any trapped air.
-
Check Alignment:
Step back and ensure the image is straight and properly aligned. Make any necessary adjustments before the adhesive sets completely.
Finishing Touches
Complete your project with these final steps:
-
Trim Excess:
If there’s any excess paper along the edges, carefully trim it off with a craft knife for a clean finish.
-
Seal Edges:
Apply a clear sealant around the edges of the image if needed. This helps prevent peeling and ensures the longevity of your print.
Troubleshooting and Tips
If you encounter issues, these tips can help:
-
Air Bubbles:
Use a squeegee to push air bubbles out towards the edges. If bubbles persist, gently lift the area and reapply with smoother pressure.
-
Peeling Edges:
If the edges start peeling, apply more adhesive or use a clear sealant to secure them.
-
Image Alignment:
If the image isn’t aligning properly, gently peel it back and reposition it. Be careful not to tear the image or damage the wall.
Conclusion
Waller printing at home is a rewarding project that allows you to easily personalise your space. By following these steps on how to print on waller printing at home, you’ll achieve a professional look that enhances your home decor. Remember to take your time with each step and enjoy the process of transforming your walls!